Tutorial
This tutorial gives you a first impression of what you can do with Objective-Cloud. It contains a complete development cycle from your registration to the running cloud app on our servers.
If you do not have an account you still can test the magic of Objective-Cloud locally. To do so
- Download a non-personalized Xcode project here. and move it to a folder of your choice.
- Download the local test environment (Terrasphere) here.
- Continue reading here
Create a new Account
It is not required to create an Objective Cloud account in order to use Objective-Cloud locally. Although creating an account right away makes it easier to get started. You create an account at Objective-Cloud Connect.

The first thing you have to do after creating a new account is to login, go to your account settings and add your public key. We need your public key so that we can setup git repositories for your cloud applications automatically and so that you can securely push changes to Objective Cloud.
Providing an SSH Key
You may already have a public key at hand. If you are not sure about that you can check for the existence of your public key by using Terminal:
$ cd ~/.sshIf Terminal says "No such file or directory" you do not have a public key already - so let's create one in Terminal:
$ ssh-keygen -t rsa -C "you@example.com"ssh-keygen will ask you about several things. You can simply hit enter all the time except when you have to enter a passphrase. When asked for a passphrase pick a good password which will be used to protect your private key file. SSH is tightly integrated in OS X so you won't have to enter this passphrase again and again if you don't want to.
Now you have to get the public key to Objective Cloud Connect somehow. Luckily this is very straight forward by using Terminal:
$ cat ~/.ssh/id_rsa.pub | pbcopy -pboard generalAfter doing so the contents of the public key file are in your pasteboard. Go to your account settings on Objective Cloud Connect, click on the "Public Key" text view and hit cmd+v. Now you can click on "Save". This can take a few moments.
Create a Cloud Application
Having an account makes it easy to create new cloud applications. Each cloud application only needs a name. The name has to be unique across all cloud applications as you know it from the iOS app store: A global namespace for app names.
For this tutorial the application name is "OBCLhelloworld". You have to change it to a unique name chosen by you.
- Got to the applications tab on Objective Cloud Connect
- Click on "New Application" purposes please use a unique name.
- Now click on "Create Application". This will take a few moments (up to several minutes) because behind the scenes at lot of things are happing once you click on the button.

If the name is not unique to Objective-Cloud (or git), you will get an error message:

Once Objective Cloud has created the application for you it should appear in the applications table view.
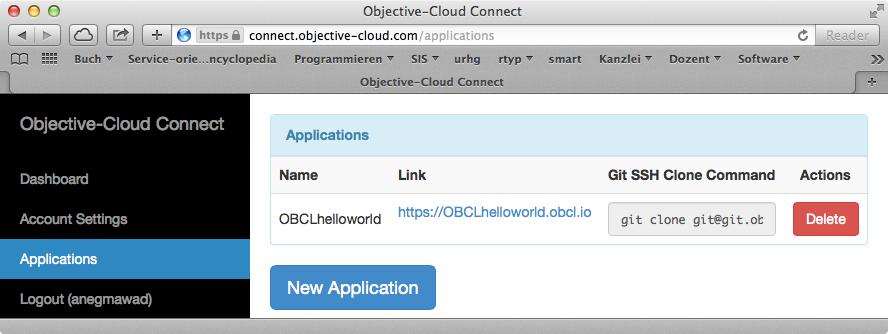
Congratulations: You have just created your first cloud application on Objective Cloud! In fact: We have automatically deployed the application on Objective Cloud.
For testing we put a default method in each project: +sayHello. You can immediately test it. Just click on the link at the second row of the application list. In the info page copy the terminal command beneath the title "On Objective-Cloud" and execute it in bash.
$ curl -X POST https://obclhelloworld.obcl.io/Service -d '{"selector" : "sayHello", arguments : []}'
{
   "returnValue" : "hello"
}
If you get no response, your cloud application hasn't been build and deployed yet. Just try it again in some minutes.
Clone the Cloud Application
The creation of a cloud application includes a git repository with a complete Xcode project. All settings are done for you. You just have to clone that repository to you local machine.
To make that as convenient as possible for you, we display the correct clone command right inside the list of applications in the third row. Simply select and copy the complete text and paste it in your terminal after moving to the destination folder:
$ cd yourProjectFolder
$ git clone git@git.objective-cloud.com:OBCLhelloworld
Cloning into 'OBCLhelloworld'...
remote: Counting objects: 34, done.
remote: Compressing objects: 100% (31/31), done.
remote: Total 34 (delta 2), reused 0 (delta 0)
Receiving objects: 100% (34/34), 579.20 KiB | 462.00 KiB/s, done.
Resolving deltas: 100% (2/2), done.
Checking connectivity... done
Get the SDK
While developing your cloud application you probably do not want to push it on our servers each time you made a change. To make developing and testing faster and easier, you can download an SDK including a scaled-down version of our server software. Simply click on the link in the green box above the application list.
You will get an installer. Run it to install the unpack the SDK.
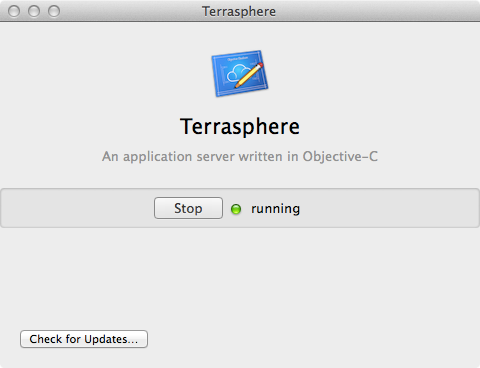
After installing you will find an application called Terrasphere in your applications folder. You have to run it, if you want to test your cloud application locally. Start it now for this tutorial. When a window pops-up click on Start to launch the daemon.
Invocation-based Service
Open the Xcode workspace you received by cloning (having a registered account) or by downloading (without a registered account). In Xcode you will find the generated code.
Every cloud application contains a number of invocation-based services and request-based services. To make a long story short: Invocation based services are used in Objective-C style with an invocation, request based services in a HTTP style using HTTP requests. You can mix them up as you want in a single application.
The delivered Xcode project already contains a invocation-based service Service implementing a method +sayHello you tested some minutes ago. We will test the cloud application locally. Simply build and run it in Xcode. When it is launched, try to send a message to it:
$ curl -X POST http://localhost:10000/Service/sayHello
{
  "returnValue" : "hello"
}Next we will add a method to the cloud application. Its name is sumOf:and:. Simply add it to Service.m as a class method beneath the existing method:
1 @implementation Service
2 …
3 + (NSNumber*)sumOf:(NSNumber*)a and:(NSNumber*)b
4 {
5   return @(a.integerValue + b.integerValue);
6 }
7 @end
Before you can use it, you have to publish it in the cloud interface. We have to edit ServiceCloudInterface.h:
1 @protocol ServiceCloudInterface <NSObject>
2 …
3 + (NSNumber*)sumOf:(NSNumber*)a and:(NSNumber*)b;
4 @end
Rerun the cloud application in Xcode and send the request using curl again. Now it should work:
curl -X POST localhost:10000/Service/sumOf:and: -d "a=1&b=2"

{
  "returnValue" : 3
}
Request-based Services
If you want to break the limitations of Objective-C's method invocation mechanism, you can do that with request based services.
It is as easy as it can be. For example the information page about the curls you saw in connect.objective-cloud.com is build by the cloud application itself. When you clone the generated project, it ships with an extra class handling every type of request: CloudApp.
In Xcode's project navigator just browse to CloudApp.m and open it:
@implementation CloudApp
+ (void)finishLaunching {
  [self handleRequestsWithMethod:@"GET" matchingPath:@"/" withBlock:^(OCFRequest *request) {
    NSString *appName = [[NSBundle mainBundle] infoDictionary][@"OCFCloudAppName"];
    NSMutableString *result = [NSMutableString new];

    [result appendString:@"<!DOCTYPE HTML PUBLIC \"-//W3C//DTD HTML 4.01 Transitional//EN\" \"http://www.w3.org/TR/html4/loose.dtd\">"];
    [result appendString:@"<html><head>"];
    [result appendString:@"<style type=\"text/css\">body {font-family: \"HelveticaNeue-Light\", \"Helvetica Neue Light\", \"Helvetica Neue\", Helvetica, Arial, \"Lucida Grande\", sans-serif;} pre { background-color:#efefef; padding:10px;  overflow: auto; word-wrap: normal; white-space: pre; }</style>"];
    [result appendFormat:@"<title>%@</title>", appName];
    [result appendString:@"</head><body>"];
    [result appendString:@"<h1>Congratulations!</h1>"];
    [result appendString:@"<p>You did it! Your cloud application is running! You can now invoke methods by using Terminal (or any other HTTP client). Give it a try.</p>"];
    [result appendString:@"<h2>On localhost</h2>"];
    [result appendFormat:@"<pre>curl -X POST localhost:10000/Service -d '{\"selector\" : \"sayHello\", \"arguments\" : []}'</pre>"];
    [result appendString:@"<h2>On Objective-Cloud</h2>"];
    [result appendFormat:@"<pre>curl -X POST https://%@.obcl.io/Service -d '{\"selector\" : \"sayHello\", \"arguments\" : []}'</pre>", appName];
    [result appendString:@"</body></html>"];

    [request respondWith:result];
  }];
}
@end
As you can see, it takes only one line of code to make a block reachable from everywhere. You can add as many patterns as you want to your cloud app.
The invocation mechanism is simply a special case of a block executed on a request to make the handling of Objective-C style messages more convenient. So you can do in the block everything we did. This includes writing a pattern that overwrites the path for invoking a method.
Publish your Cloud Application
When you are done with developing and testing your cloud application, you simply push it into the repository using Xcode's source control menu. We receive it, we pull it, we build it, we deploy it.
After changing the host name back to your cloud application's name and the HTTP protocol to HTTPS, you can use the cloud application from your client.
Further Reading
Now you get a first impression of Objective-Cloud and its awesome features. To get in more detail, you should read:
For the client side we have support, too: