Using a Database
You use a database to persist data between calls of your application. Another great thing that you can do with databases is to share state between your apps and, more importantly, between the instances of your apps. Remember: Your app is running on multiple servers. The servers do not know each other. A database is accessible from every server and thus it can be used to share data/state between servers. Before you can use a database you have to create one.

We are using PostgreSQL. If you don't know PostgreSQL yet don't worry. We have written a nice and simple Objective-C framework which let's you talk to your databases easily.
Activating the Database Integration
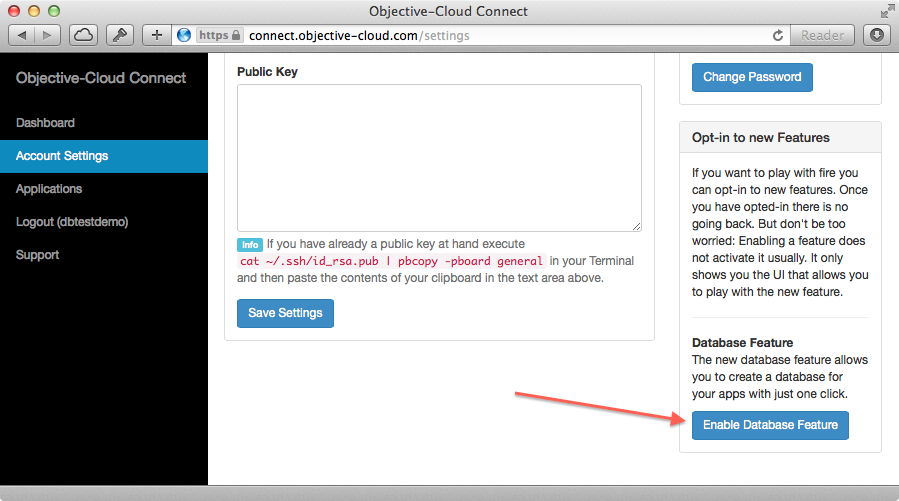
The database integration is not enabled by default. This is because it is still in beta. So you have to opt-in. This is a one-step process. Our tests showed that the database integration is already pretty stable but still: We want to make sure you understand that it is still in beta. To activate the database integration go to Objective-Cloud Connect, login and then go to Account Settings. Then you can enable the database feature there. Once you have done that you can create databases and use them to store anything you want.
In order to use the database integration locally (for testing or evaluation purposes you do not need an Objective-Cloud account). Skip to the paragraph about Testing locally.
Creating a Database
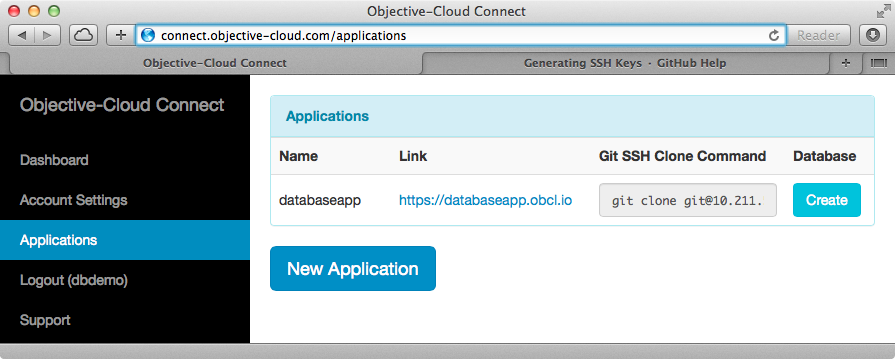
When you create a cloud application we do not create a database for this app automatically. You have to create a database for your applications individually. This is done in Objective-Cloud Connect. In the Applications view there is a column called Database. Click on Create in order to create a database.
A few seconds later the Create-button turns into a link saying Show.
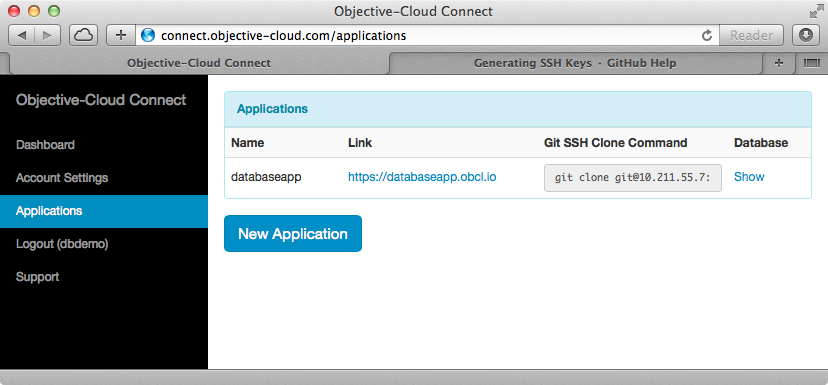
When you click on that link you will see the details for that database.
Details of a Database
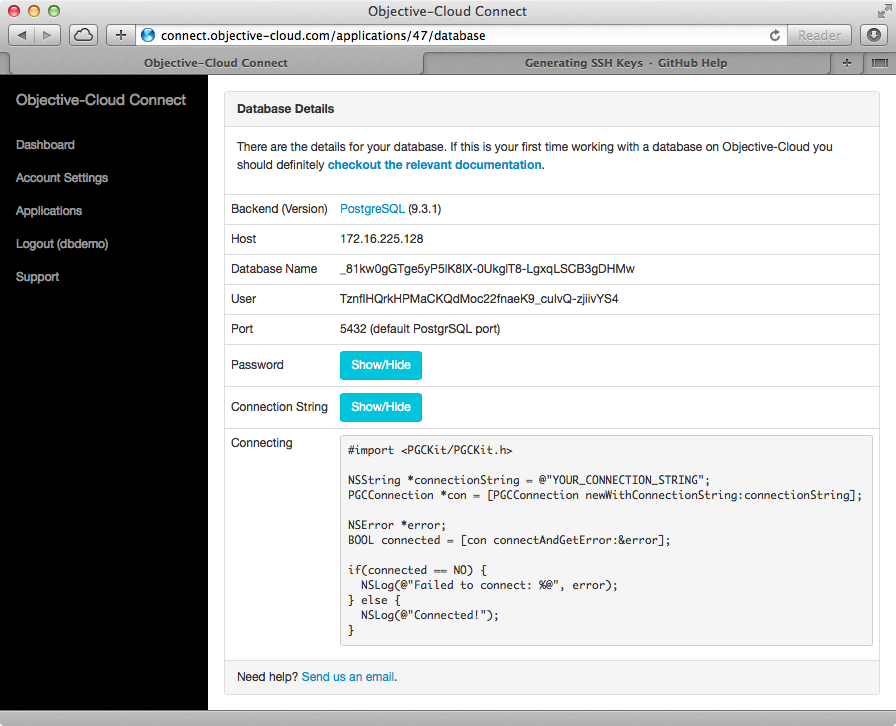
The details of a database contain all the necessary information that are needed to use the database.
Connecting to a Database
You can connect to your database in many ways. The following paragraphs describe two possibilities. The first way that is described shows how you would connect to your database from your app. The way makes use of the connection string and connects to your database via Terminal/psql. The connection string is a string that contains all information that are necessary in order to establish a connection to your database. You can get the connection string by clicking on Show/Hide in the connection string row on the details page.
Before you dive in make sure that you have the latest version of Objective-Cloud installed on your Mac. This is important because the latest version installs
PGCKit(PostgreSQL Client Kit), an Objective-C framework for interacting with a PostgreSQL database.
Connecting from your App
You obviously want to use the database in your cloud application. So let's have a look at how you would do that. Connections are established using PGCKit. PGCKit is a lightweight Objective-C framework that lets you talk to your database.
Connecting to your database is very easy. This is how you would do it:
 1 #import "CloudApp.h"
 2 #import <OCFoundation/OCFoundation.h>
 3 #import <PGCKit/PGCKit.h> // import the new PGCKit
 4
 5 @implementation CloudApp
 6
 7 + (void)finishLaunching {
 8
 9   // Get the default connection object
10   PGCConnection *connection = [self defaultDatabaseConnection];
11
12   // Try to connect
13   NSError *error;
14   BOOL connected = [connection connectAndGetError:&error];
15
16   // Handle errors
17   if(connected == NO) {
18     NSLog(@"Failed to connect: %@", error);
19   } else {
20     NSLog(@"Connected!");
21   }
22 }
23
24 @end
If you have created a database for your app you have to do three things in order to establish a connection:
- Call
+defaultDatabaseConnectionon the class object of your cloud app to obtain thePGCConnectioninstance.+defaultDatabaseConnectionreturns nil if the database server is offline or if your app does not have an associated database. - Call
+connectAndGetError:in order to establish the connection to your database. By default+defaultDatabaseConnectionreturns a connection object which is not yet connected to your database. You should only call+connectAndGetError:when you actually need an open database connection. In order to get started we recommend that you call+connectAndGetError:immediately and optimize later. - Redeploy your app.
This way of doing it has the advantage that your database credentials are not in your code/repository. Behind the scenes your cloud app requests the database credentials from Objective-Cloud and creates the default database connection.
Connecting from the Command Line
You can also connect to your databases from the command line (or by using any other PostgreSQL client). This is useful for several reasons:
- View your data: There are a lot of PostgreSQL GUIs out there. Use them to quickly see what is actually stored in your database.
- Backup your data independently: We backup your database automatically for you. If you want you can create backups independently by using pg_dump for any other backup tool.
In order to connect to your database from the command line you have to install the PostgreSQL command line tool first. An easy way to do that is to install Postgres.app. This app contains a whole PostgreSQL distribution and also the PostgreSQL command line tool.
Once you have installed it you find the PostgreSQL command line tool at /Applications/Postgres93.app/Contents/MacOS/bin/psql (please note the version number in the name of the Postgres.app). To connect to your database execute the following command in Terminal:
$ /Applications/Postgres93.app/Contents/MacOS/bin/psql "YOUR_CONNECTION_STRING"Press enter and then you should see a prompt that let's you enter any SQL command.
Testing locally
You don't want to test/develop on your production database. Instead you should install PostgreSQL locally. Follow these steps:
- Install PostgreSQL locally: Download and install Postgres.app.
- Start Postgres.app and read the Postgres.app documentation. To sum the documentation up:
- Add
Applications/Postgres93.app/Contents/MacOS/bin/to your$PATH - The default user and the default database of
psqlis$USER. So if your username isBillthen Postgres.app automatically created a database calledBilland a user calledBill. The password is not set.
- Add
- The connection string for testing locally can thus be obtained by executing the following command in Terminal:
echo "dbname=$USER host=localhost user=$USER" | pbcopy. Once that command is executed the connection string is in your clipboard. You can now use this connection string to connect to your local database with psql.
As already mentioned, onc of the cool things about Postgres.app is that it creates a default database and database user for you. Postgres.app is using your current username $USER as the database and user name. This fact is used by Terrasphere. When you execute your app locally calling +defaultDatabaseConnection returns a database connection which will connect the database user called $USER to the database called $USER (with no password). This means that your code is the same whether you are running locally or in the cloud. It looks like this:
 1 #import "CloudApp.h"
 2 #import <OCFoundation/OCFoundation.h>
 3 #import <PGCKit/PGCKit.h> // import the new PGCKit
 4
 5 @implementation CloudApp
 6
 7 + (void)finishLaunching {
 8
 9   // Get the default connection object
10   PGCConnection *connection = [self defaultDatabaseConnection];
11
12   // Try to connect
13   NSError *error;
14   BOOL connected = [connection connectAndGetError:&error];
15
16   // Handle errors
17   if(connected == NO) {
18     NSLog(@"Failed to connect: %@", error);
19   } else {
20     NSLog(@"Connected!");
21   }
22 }
23
24 @end
Executing Queries/Commands
You connect to a database in order to execute queries/commands. You do that by sending execute:withArguments:error: to your database connection. Here is an example:
1 NSError *error;
2 NSString *query = @"SELECT name, age FROM person WHERE name = $1 AND age = $2";
3 PGCResult *result = [connection execute:query withArguments:@[@"Chris", @25] error:&error];
4 if(result == nil) {
5   NSLog(@"failed to execute query: %@", error);
6   abort(); // replace this with something better
7 }
This is what the code does:
- Line 2: Define an SQL query with two placeholders. Placeholders have the form
$nwherenis a number starting a1. Before the query is actually executed those placeholders are replaced by the values contained in the arguments array (second parameter). The arguments array can contain instances of the following classes:NSString,NSNumber(for wrappingBOOLs,ints,floats),NSDate,NSNull(forNULLvalues) andNSData. So if you wanted to get all persons whose name isChrisand whose age is25then the arguments array would look like this:@[@"Chris", @25]. - Line 3: The query from line 2 as well as the arguments
@[@"Chris", @25]are passed to-execute:withArguments:error:which returns an instance ofPGCResulton success. - Line 4-7: If the returned result is
nilthen an error occurred.
If the returned result object is not nil you can get the actual values from it:
for(NSUInteger row = 0; row < result.numberOfRows; row++) {
  NSString *name = [result stringForRow:row column:@"name"];
  NSLog(@"name: %@", name);
  NSInteger age = [result integerForRow:row column:@"age"];
  if(age == NSIntegerMin) { // NSIntegerMin means NULL
    NSLog(@"age: NULL");
  } else {
    NSLog(@"age: %li", age);
  }
}